The Nest thermostat, a smart thermostat that has taken the world by storm, has completely transformed the way we regulate the temperature in our homes. With its ability to learn your preferences and adjust the temperature accordingly, it has become a cost-effective and energy-efficient solution for many households.
The Nest thermostat is incredibly user-friendly and can be controlled remotely through a smartphone app or voice commands, making it a convenient option for those on the go. However, despite its many benefits, some users have reported issues with the Nest thermostat not cooling their homes properly. This can be a frustrating problem to deal with, but fear not, as we are here to help you troubleshoot the issue and get your Nest thermostat back on track.
So, let’s dive into the possible reasons why your Nest thermostat may not be cooling your home and explore some solutions to get it working properly again.
Table of Contents
Troubleshooting the Nest Thermostat Not Cooling
In the event that your Nest thermostat is not cooling, there are a few steps you can take to troubleshoot the issue. Firstly, it’s important to check the temperature settings on your Nest thermostat. Ensure that the temperature settings are set to a temperature that is lower than the current room temperature. If the temperature is set too high, the thermostat won’t turn on the cooling system.
Secondly, it’s crucial to check the power source of your Nest thermostat. Ensure that your Nest thermostat is receiving power. If the thermostat is not receiving power, it won’t be able to control your HVAC system. Check the wiring and make sure that the thermostat is properly connected to your HVAC system.
Thirdly, it’s important to check the air filter. A dirty air filter can restrict airflow and cause your Nest thermostat not to cool properly. Check your air filter and replace it if it’s dirty.
Fourthly, it’s important to check the HVAC system. If your Nest thermostat is not cooling, it could be an issue with your HVAC system. Check your HVAC system to ensure that it’s functioning properly. If you’re not comfortable doing this yourself, contact a professional HVAC technician.
Lastly, it’s important to check for software updates. Make sure that your Nest thermostat is running the latest software. If there are any updates available, install them to ensure that your thermostat is functioning properly.
If you’ve tried all of these troubleshooting steps and your Nest thermostat is still not cooling, it may be time to contact Nest customer support for further assistance.
Check the Power Source
When it comes to your Nest thermostat not cooling your home, there are a plethora of potential problems that could be causing the issue. However, one of the most common culprits is a power source problem. It’s crucial to first check that your thermostat is receiving power before diving into other potential issues.
To ensure that your thermostat is properly powered, there are a few steps you can take. Firstly, make sure that your thermostat is securely connected to your HVAC system and that the wires are properly attached. If the wires are loose or disconnected, your thermostat won’t be able to communicate with your HVAC system and won’t be able to control the temperature.
Next, it’s important to check that your thermostat is receiving power from your home’s electrical system. If your thermostat is battery-powered, be sure to check that the batteries are fresh and properly installed. If your thermostat is hardwired, you’ll need to check that the circuit breaker for your HVAC system is turned on and that the wiring is properly connected.
If you’ve gone through these steps and your Nest thermostat is still not cooling your home, it’s time to move on to other potential issues. However, it’s important to remember that ensuring your thermostat is properly powered is a crucial first step in troubleshooting any cooling issues.
Check the Thermostat Settings
When it comes to troubleshooting your Nest thermostat, there are a few things you should consider. One of the first things to check is the thermostat settings. It’s possible that the settings may have been changed accidentally or intentionally, causing the thermostat to not cool your home as expected.
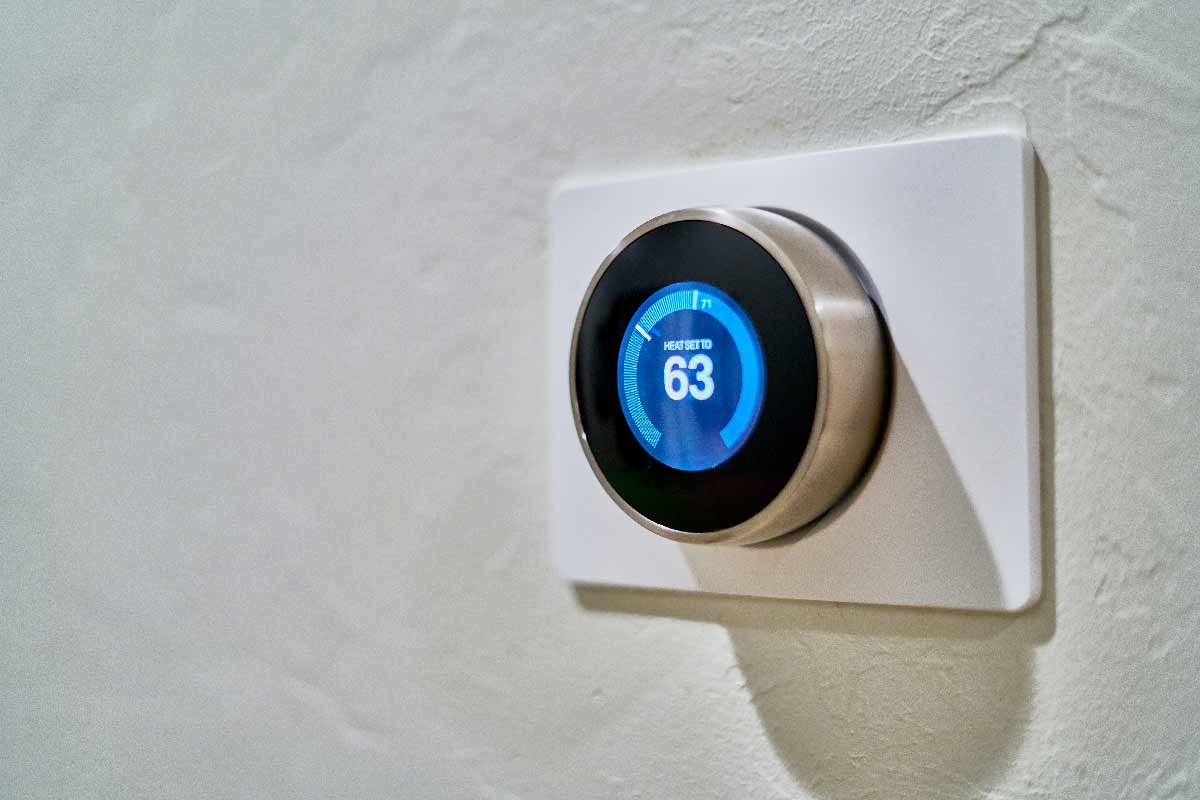
To check the thermostat settings, you’ll need to wake up the thermostat display by pressing it. Once it’s awake, tap on the settings icon and navigate to the “Cool” option. Here’s where things get interesting – you’ll need to ensure that the temperature is set to a temperature that is lower than the current room temperature. If the temperature is set too high, the thermostat will not activate the cooling system. This is where perplexity comes in – you’ll need to pay close attention to the temperature settings and make sure they’re just right.
You’ll also need to check the fan settings to ensure that the fan is set to “Auto” mode. If the fan is set to “On” mode, it will run continuously, even when the cooling system is not activated, which can cause the air to feel warmer. Quickness comes into play here – you’ll need to switch between checking the temperature settings and the fan settings, making sure everything is just right.
If the thermostat settings appear to be correct, try resetting the thermostat to its default settings. This can be done by navigating to the “Reset” option in the settings menu and selecting “Reset to Defaults.” This will erase any custom settings and return the thermostat to its original settings. This is where quickness comes in again – you’ll need to switch between checking the settings and resetting the thermostat.
If the thermostat settings are not the issue, there may be a problem with the cooling system itself. In this case, it is recommended to contact a professional HVAC technician to diagnose and repair the issue. This is where perplexity comes in again – you’ll need to consider the possibility of a more complex issue and seek professional help if necessary.
Check the Air Filter
One of the most common reasons why your Nest thermostat may not be cooling your home is due to a dirty or clogged air filter. The air filter is responsible for trapping dust, dirt, and other particles that can accumulate over time and restrict the airflow in your HVAC system. When the airflow is restricted, it can cause your Nest thermostat to work harder than it should, resulting in poor cooling performance.
But how can you tell if your air filter is dirty or clogged? Well, it’s a simple process. Locate the air filter in your HVAC system and remove it. Hold it up to a light source and check if you can see through it. If the filter appears dirty or clogged, it’s time to replace it.
Now, replacing the air filter is a task that you can do yourself. First, purchase a new air filter that matches the size and type of your old filter. Then, turn off your HVAC system and remove the old filter. Insert the new filter in the same direction as the old filter and make sure it’s securely in place. Finally, turn on your HVAC system and check if your Nest thermostat is now cooling your home properly.
It’s important to note that regularly checking and replacing your air filter is crucial to ensure that your Nest thermostat is working efficiently and effectively to cool your home. The recommended time frame for replacing your air filter is every 1-3 months, depending on the level of usage and the type of filter you have. So, don’t neglect this simple task and keep your Nest thermostat running smoothly!
Check the HVAC System
When it comes to troubleshooting your Nest thermostat, there are a few things you should keep in mind. First and foremost, it’s important to understand that your Nest thermostat relies heavily on your HVAC system to keep your home cool. So, if there’s an issue with your HVAC system, it can have a direct impact on the performance of your Nest thermostat.
To start, you’ll want to check your air filter. This may seem like a small detail, but a dirty air filter can actually cause a lot of problems. When your air filter is clogged with dirt and debris, it can restrict airflow and force your HVAC system to work harder than it needs to. This, in turn, can lead to poor cooling performance and a less-than-ideal living environment. If you suspect that your air filter is dirty, it’s important to replace it with a new one as soon as possible.
Next, you’ll want to take a look at your outdoor unit. This is the part of your HVAC system that sits outside your home and is responsible for expelling hot air. Make sure that it’s free of debris and that the fan is spinning properly. If the fan isn’t spinning, it could be a sign of a faulty motor or capacitor, which will require professional repair.
Another thing to check is your ductwork. Over time, your ductwork can develop leaks or become damaged, which can cause cool air to escape before it reaches your living space. This can lead to poor cooling performance and a less-than-ideal living environment. If you suspect that your ductwork is damaged or leaking, it’s important to have it repaired by a professional.
Finally, you’ll want to check your refrigerant levels. Low refrigerant levels can cause your HVAC system to struggle to cool your home, which can have a direct impact on the performance of your Nest thermostat. If you suspect that your refrigerant levels are low, it’s important to contact a professional to have them checked and refilled if necessary.
By taking the time to check your HVAC system, you can identify any issues that may be affecting the performance of your Nest thermostat and take steps to address them. With a little bit of effort and attention to detail, you can keep your home cool and comfortable all summer long.
Check for Obstructions
When it comes to your Nest thermostat, there are a plethora of reasons why it may not be cooling your home. However, one of the most common culprits is obstructions. These pesky obstructions can prevent cool air from circulating properly, resulting in a warmer home.
To tackle this issue head-on, you’ll need to start by inspecting your air vents and registers. Take a good look at them and make sure they aren’t blocked by any furniture, curtains, or other objects. If you do happen to find any obstructions, it’s time to move them away from the vents to allow for proper airflow.
You’ll also want to check your air filter. A dirty air filter can also obstruct airflow and prevent your Nest thermostat from cooling your home. If you notice that your air filter is dirty, it’s time to replace it with a new one.
Last but not least, it’s time to check your outdoor unit. Take a peek and make sure it isn’t obstructed by any debris such as leaves, branches, or dirt. If you do happen to find any obstructions, it’s time to clear them away to allow for proper airflow.
By taking these steps and checking for obstructions, you can ensure that your Nest thermostat is able to cool your home effectively and efficiently. However, if you continue to experience issues with your Nest thermostat not cooling, it may be time to contact a professional HVAC technician for further assistance.
Check for Refrigerant Leaks
The Nest thermostat is a complex system that requires a great deal of attention to detail. One of the most common reasons why your Nest thermostat may not be cooling your home is due to refrigerant leaks. Refrigerant is a vital component in your air conditioning system, and if it is leaking, it can cause your system to malfunction.
To check for refrigerant leaks, you will need to hire a professional HVAC technician. They will use specialized equipment to detect any leaks in your system. This process can be quite complex and requires a great deal of expertise. If a leak is found, the technician will repair it and recharge your system with the appropriate amount of refrigerant.
It is important to note that refrigerant leaks can be harmful to the environment and your health. Therefore, it is crucial to address any leaks as soon as possible to prevent further damage to your system and the environment. This is a critical step in ensuring that your Nest thermostat is functioning properly and efficiently.
In addition to checking for refrigerant leaks, the technician may also inspect other components of your air conditioning system, such as the compressor, evaporator coil, and condenser. These components are all critical to the proper functioning of your Nest thermostat. By identifying and addressing any issues, your Nest thermostat should be able to cool your home efficiently and effectively.
Overall, it is important to take a proactive approach to maintaining your Nest thermostat. By addressing any issues as soon as they arise, you can ensure that your system is functioning properly and efficiently. This will not only save you money on your energy bills, but it will also help to protect the environment.
Contact Nest Support
In the event that your Nest thermostat is not cooling, despite having gone through all the troubleshooting steps, it may be time to seek assistance from Nest support. The Nest support team is available 24/7 to help you with any issues you may be encountering with your thermostat.
To get in touch with Nest support, you can either visit their website and submit a support request or call their support line at 1-855-469-6378. When reaching out to support, it is important to have your Nest thermostat serial number and any troubleshooting steps you have already taken on hand.
The Nest support team will collaborate with you to identify the problem and provide a solution. In certain cases, they may need to dispatch a technician to your residence to repair or replace your thermostat.
It is worth noting that Nest offers a 2-year limited warranty on their thermostats. If your thermostat is still under warranty, you may be eligible for a free replacement. Before contacting support, make sure to check your warranty information.
Overall, Nest support is committed to delivering exceptional customer service and ensuring that your Nest thermostat is functioning correctly. Do not hesitate to contact them if you are experiencing any issues with your thermostat.
Conclusion: Maintaining Your Nest Thermostat
In order to maintain the optimal performance and efficiency of your Nest thermostat, it is imperative to conduct regular maintenance. Here are some tips to keep your Nest thermostat in tip-top shape:
1. Regularly clean the thermostat: Accumulation of dust and debris on the thermostat can have a detrimental effect on its performance. It is recommended to use a soft, dry cloth to wipe the thermostat clean.
2. Check the wiring: Ensure that the wiring is properly connected and not damaged. Loose or damaged wiring can cause the thermostat to malfunction, leading to suboptimal performance.
3. Keep the thermostat away from direct sunlight: Direct sunlight can have a significant impact on the temperature readings, causing the thermostat to work harder than necessary. This can lead to a decrease in efficiency and performance.
4. Check the air filter: A dirty air filter can restrict airflow, causing the thermostat to work harder than necessary. It is important to replace the air filter regularly to ensure proper airflow and optimal performance.
5. Schedule regular maintenance: It is highly recommended to schedule an annual maintenance check with a professional HVAC technician to ensure that your Nest thermostat is functioning properly and efficiently. This will help to identify any potential issues and ensure that your thermostat is operating at its best.
By following these simple yet effective maintenance tips, you can ensure that your Nest thermostat continues to provide you with reliable and efficient cooling for years to come. Don’t neglect the maintenance of your Nest thermostat, as it is a crucial component in maintaining a comfortable and efficient home environment.
Frequently Asked Questions
Why is my Nest thermostat not cooling?
There could be several reasons why your Nest thermostat is not cooling. It could be due to a malfunctioning compressor, a dirty air filter, low refrigerant levels, or a faulty thermostat. It’s best to troubleshoot the issue to determine the root cause.
How do I troubleshoot my Nest thermostat?
You can troubleshoot your Nest thermostat by checking the air filter, ensuring that the thermostat is set to “cool,” checking the circuit breaker, and resetting the thermostat. If these steps don’t work, you may need to contact a professional HVAC technician.
What should I do if my Nest thermostat is not connecting to Wi-Fi?
If your Nest thermostat is not connecting to Wi-Fi, try resetting your Wi-Fi network, restarting your router, and resetting your thermostat. If these steps don’t work, you may need to contact Nest customer support for further assistance.
How often should I replace my Nest thermostat?
Nest thermostats are designed to last for several years, but it’s recommended to replace them every 5-10 years. If you notice any issues with your thermostat, such as it not cooling or not connecting to Wi-Fi, it may be time to replace it.
Can I install a Nest thermostat myself?
While it’s possible to install a Nest thermostat yourself, it’s recommended to have a professional HVAC technician install it for you. This will ensure that the thermostat is installed correctly and that it will function properly.